

I love vintage sheeting, whenever I use some I find it hard to throw all the small scraps away. I'm planning a scrappy type of quilt (*read - long term project), but I'd thought I'd come up with a quick and easy idea that would see me using some of my scraps up a little sooner.
Welcome the - Floral Wreath Tote!
If you want to make one too you will need the following:
- Scraps of fabric with flowers/leaves, could be sheeting or any other floral fabric that takes your fancy.
- Visoflix, or Heat n bond I think it's also known as.
- Fabric for the tote, I've used a hard wearing denim
- Fabric for the lining, I chose some vintage sheeting and a plain cotton.
- Iron
- Sewing machine
Cut the following from both the main fabric and the lining:
Front and Back : 40cm x 35cm - 2x main fabric 2x lining
Sides: 40cm x 14cm - 2x main fabric 2x lining
Base: 35cm x 14cm - 2x main fabric 2x lining
Handles: 60cm x 10cm - 2x main fabric or contrasting fabric.

I started by cutting out my floral scraps close to the blooms. I didn't cut them too close to the edge, making sure there was a margin of fabric around each bloom.

Cut out a piece of Visoflix to the same shape as your cut blooms. Pop a piece of baking paper over the Visoflix and your fabric when you iron it, you don't want any stray sticky stuff on your iron!
*Little tip- If you are doing a lot of little pieces like in this project, write "top" on the corner of the baking paper to let you know which side has been facing up!

Once all your pieces have Visoflix on the back, cut them out. If you have blooms that overlap, just cut them to a petal shape that suits the rest of the flower ( as the bloom above). These will be covered up in the next steps.

Once all your pieces are cut out, try laying them out on the front piece of fabric. I used a lot less than I thought I was, I limited my palette and put aside the blue ones for another project. I made sure any overlapped petals were covered up by other blooms.
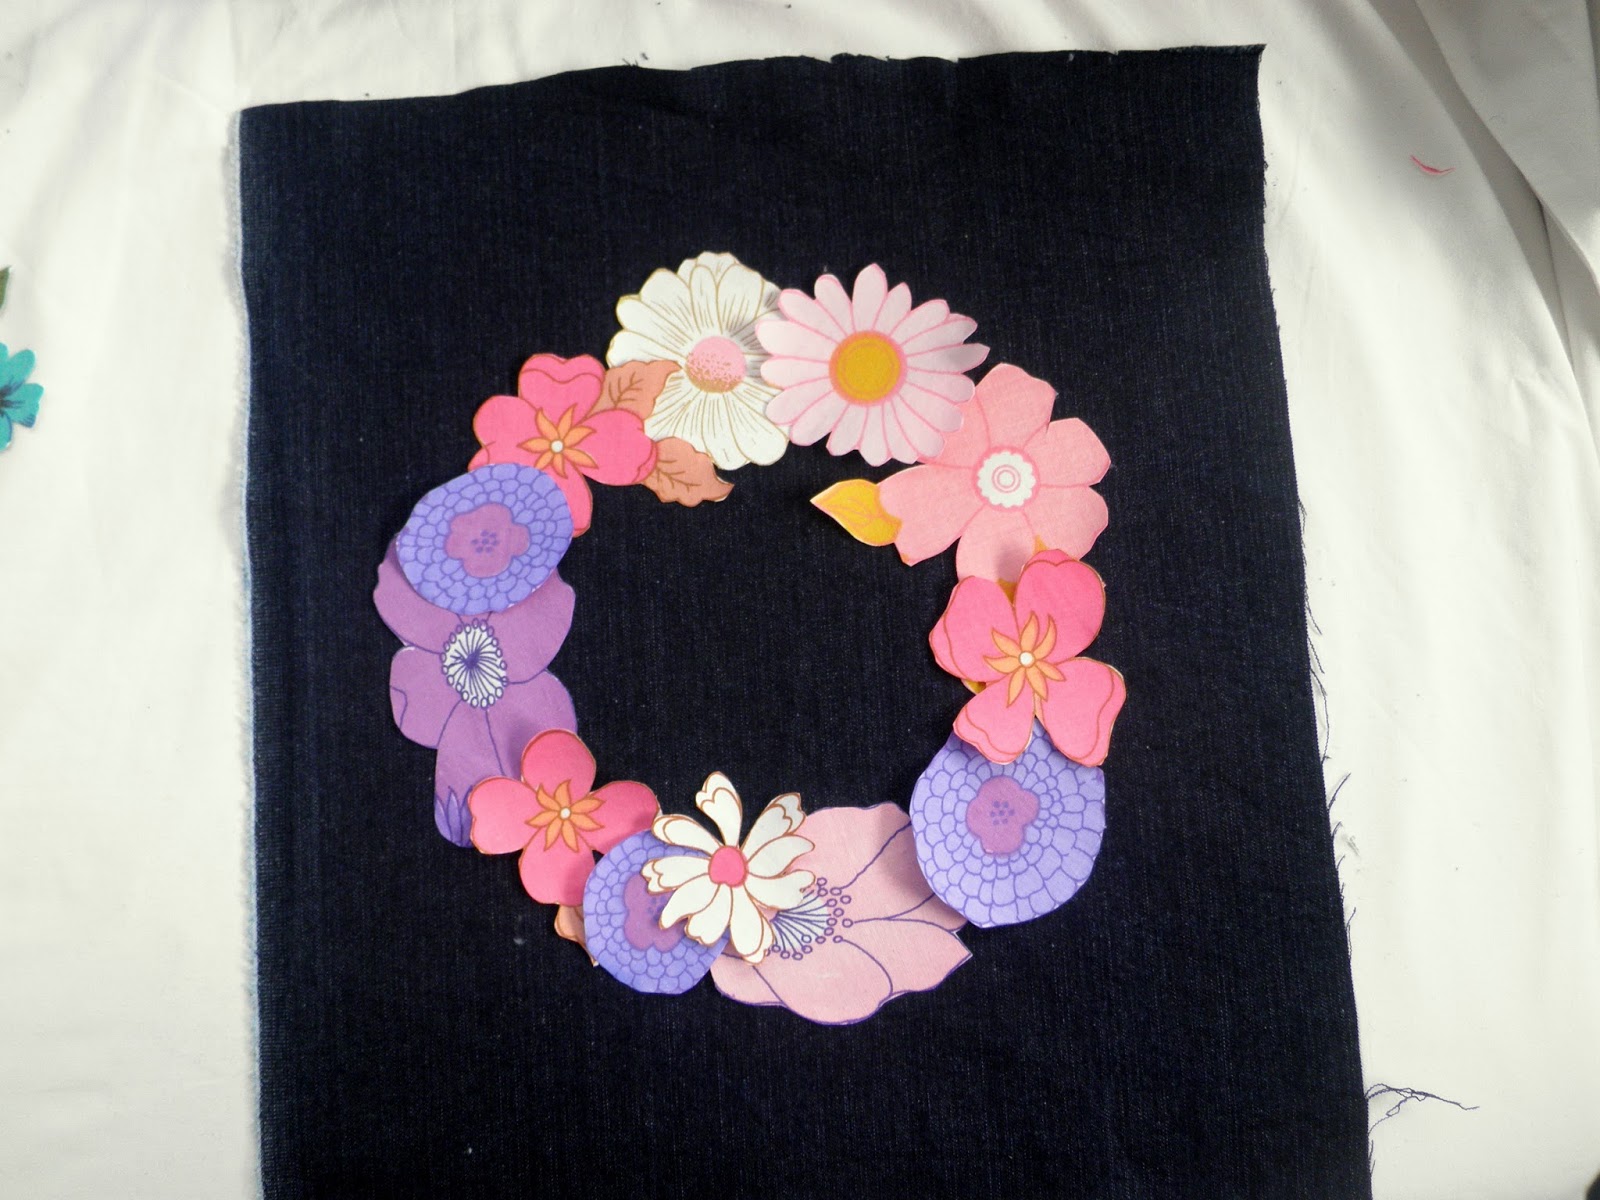
Once you are happy with your design, peel the backing off the Visoflix. I changed the final design a couple of times! It might help to have a pin or make in the center and build your wreath design around it.

Carefully iron the design down, try not to move the pieces as you iron.

Once it's all ironed down we need to add some stitching to keep it all in place. A little free motion stitching is the way to go. You might need to get your machine manual out to see if you need a special foot. For my machine it's as simple as dropping the "feed dogs" and removing the foot. If you need a tutorial or more information check out this free motion tutorial by Jennie of A little vintage.

I chose a contrasting thread and stitched around the outside first. Then I went back and stitched around the inner edges, also hitting all the overlapped bits. It doesn't have to be perfect, mine is far from it! The main idea is just to catch the edges so the florals don't fall off in the future. You can be as arty as you like!


Even with contrasting thread, the stitching doesn't really show up much from a distance.

Now that the front is finished it's tote making time! The following steps are the same for both the main part of the bag and the lining.
Right sides together stitch the front and back pieces to the base. I've used a 1cm allowance throughout, it doesn't really matter what allowance you use, as long as you are consistent.

Then stitch the sides on. I find it easy to do this if the sides are on the underside and the previous stitching on the base is on the top. I sew only until I hit that line of stitches (pictured below). Don't stitch past that point or it's hard to sew the sides up.

Stitch up each side. Matching edges as you go.

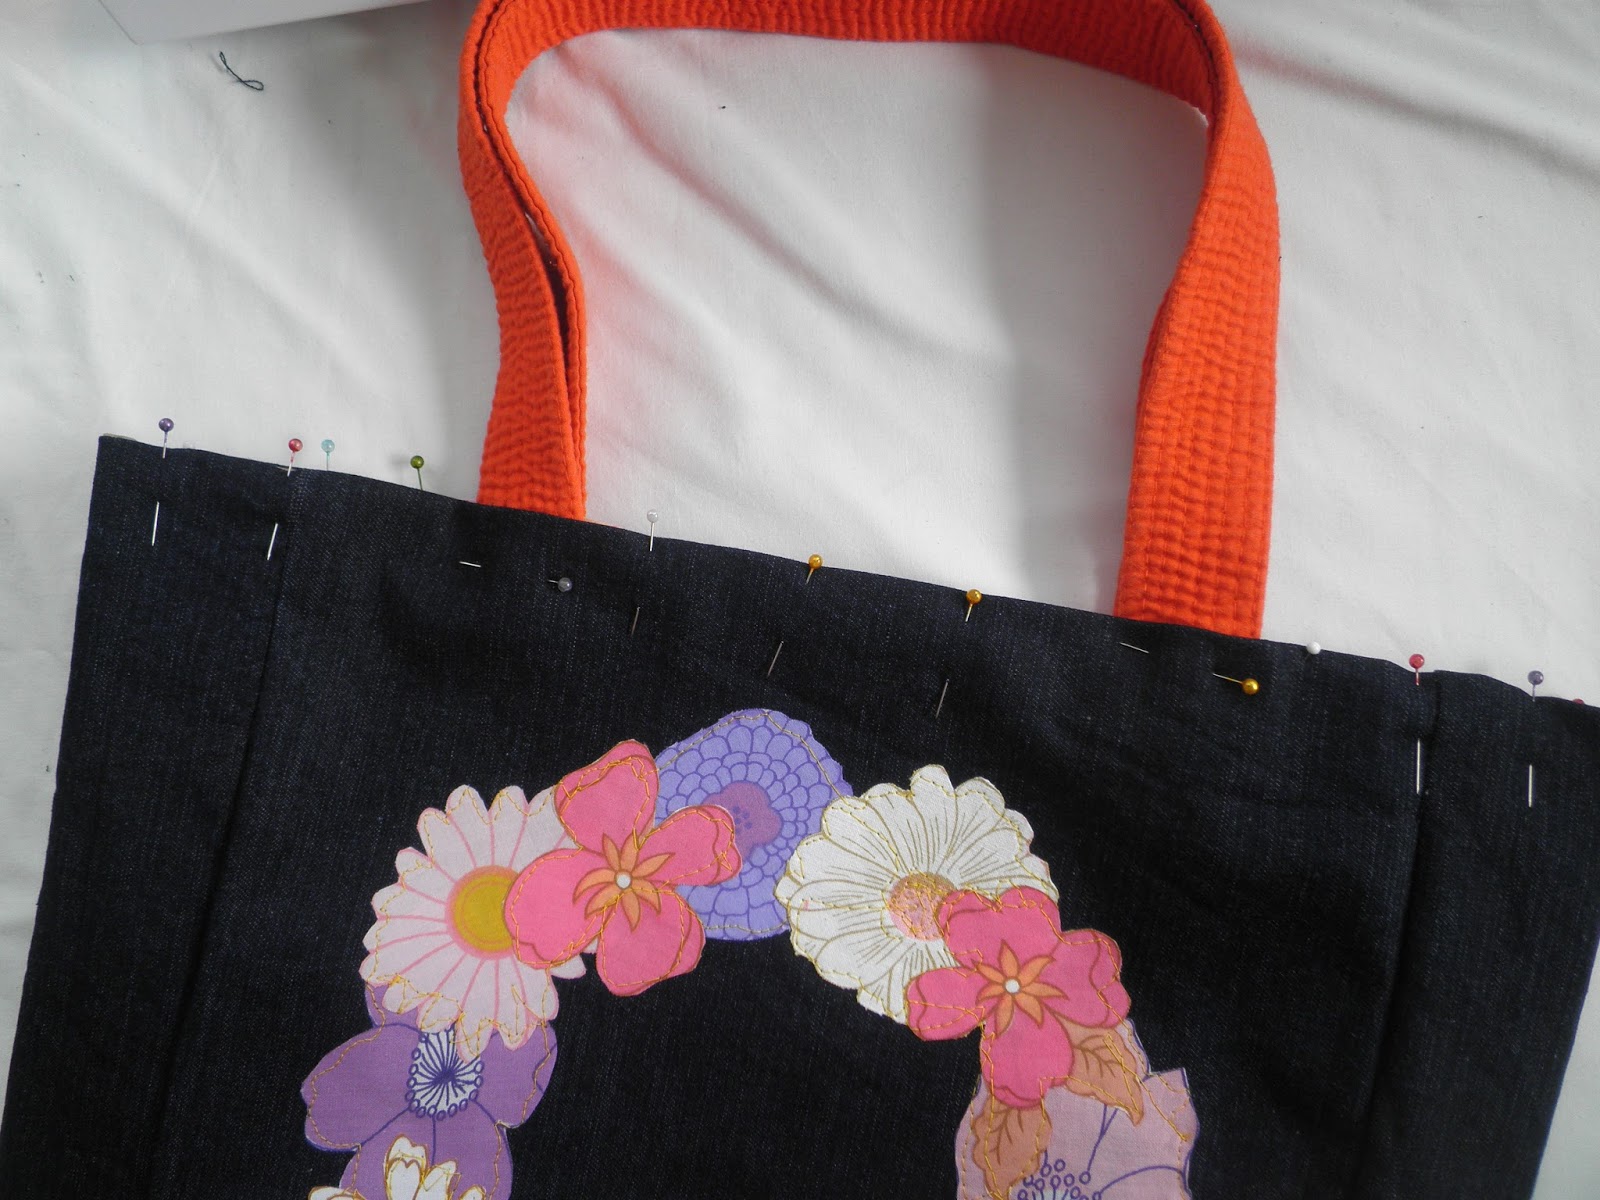
Turn over the top, around three centimeters and press. Do the same for the main part of the of the bag too. Turn the main part out the right way.

Slip the lining inside the main part of the bag, matching side seams, pin all the way around.
Make your straps. Right sides together stitch along the long edge. Turn right side out and top stitch, leaving the short edges raw.
I've actually used a thrifted Tae Kwan Do belt for my handles! Keep a look out for them, they make great bag handles. You could use a thrifted belt too.
Slip the handles between the main part of the bag and the lining, make sure they are around 5 cm below the edge. Pin. I have placed the handles around 5-6 cm from the side seams. Once pinned check the handles are both the same length and have no twists in them - a past mistake I'll never make again *wink*

Top stitch around the top. Check to see that you've caught the lining with your stitches and the handles are secure, then do another row of stitching to make sure those handles are stitched on nice and strong.

That's it! All finished! Prepare for compliments a plenty, jealous cries and pleas of "please make me one!"
Don't be limited to totes and florals, this technique could be used for animals, geometric shapes, to embellish cushions and zip purses, even quilt blocks if you have the patience!
I'd love to see yours if you make one!
Gorgeous and great tutorial! Well done :0)
ReplyDeleteLovely bag and great tutorial
ReplyDeleteIts beautiful, well done
ReplyDeleteA great well written tutorial Louana - thanks for sharing. Love the finished bag. I have been working with the vintage sheet fabrics I won from you ages ago & just love them so much :-)
ReplyDeletelove it. Well written instructions even I could follow! :)
ReplyDeleteGreat Tutorial and that bag is so lovely! well done you ;) xx
ReplyDeleteThanks for sharing louana, lovely bag. Lisa x
ReplyDeleteOh that's so pretty!! I love how you've done this. I may do something similar for Audrey. She's obsessed with bags! Thanks for sharing :)
ReplyDeleteWhat a pretty idea for a tote. Just got to go hunting for some vintage sheets now.
ReplyDeleteOh you clever thing you - such a perfect use for bright vintage sheeting - it looks amazing against the denim!
ReplyDelete